
Introduction
All features of Ultimate Search & Selection Tool (UltimateSST) are documented here. Feel free to join Discord if you have any questions or feature requests. You can also Email us at Perfect_StormTD( @ ) hotmail.com.
Installation
After you’ve downloaded UltimateSST from the Unreal Marketplace, you’ll need to add it to your project. Once that is done, the plugin will be available for you in the plugin folder. Simply launch the editor and go to Edit -> Plugins.

Once the plugin menu has opened, you can look for the plugin in the left menu. You can either search for PS Studios or UltimateSST, or look under the menu installed. Once you found the plugin, click on the checkbox Enabled.

After enabling it, make sure to restart the editor by clicking the Restart Now button.
![]()
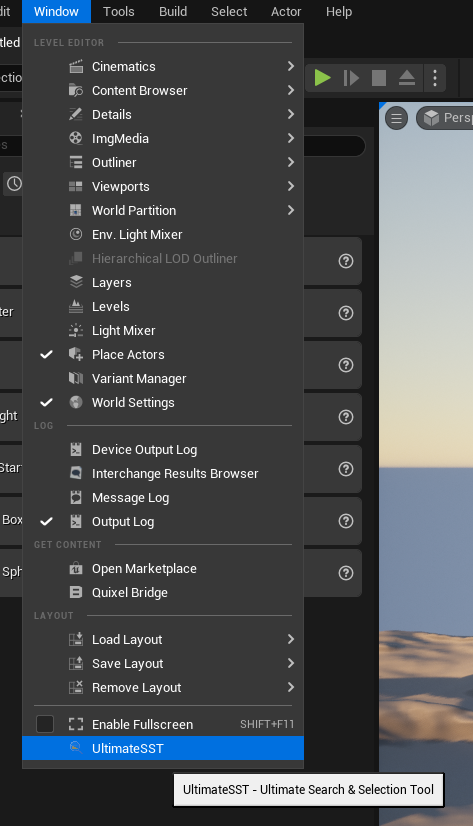
Now that we have the plugin enabled, you can start UltimateSST by clicking on the icon at the main UI bar

Alternatively, you can start it by going to Window -> UltimateSST
Finally, you can also make a keyboard shortcut. To do this, go to Edit–> Editor Preferences.
Navigate to Keyboard Shortcuts and search for UltimateSST. You should then be able to set a new key binding.

User interface of UltimateSST
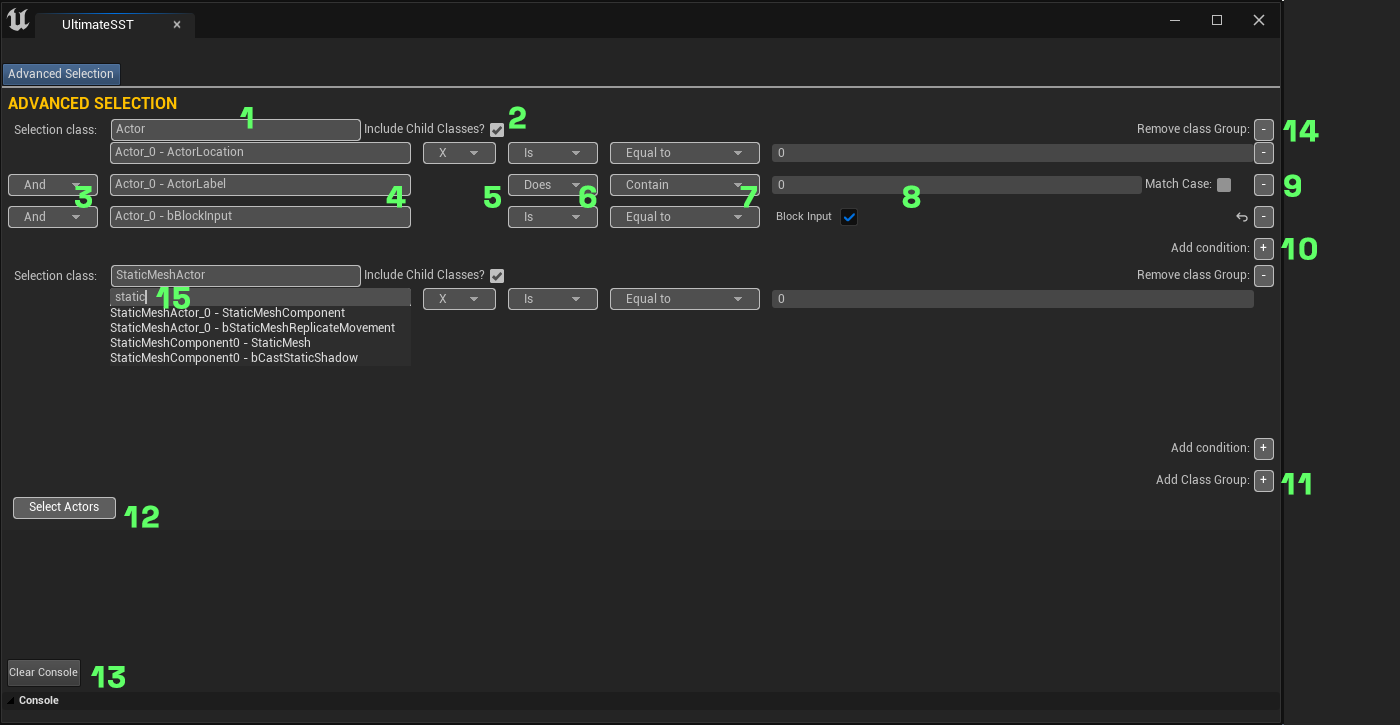
The following section explains the User Interface of UltimateSST.
- Selection Class – The class to search for. If you want to search for anything in the scene, then you can choose Actor, as all placeable actors in the scene are derrived from Actor.
- Include Child Classes – When true, all child actors are also included in the search. When false, only search for this class and ignore childs.
- And / Or – When And is selected, both this and the selection criteria above this line must be true in order to select an actor. When or is selected, one of the two may be true to select an object. You can stack as many conditions as you like.
- Actor Property – The property to search for. Please note that some actors contain actor components. Each of these components can have their own property. For example, A staticmesh actor has the bHidden property on the actor, but also on the staticmesh component.
- X, Y or Z – This property field is only visible when selecting a vector variable type. It determines the float value of the vector to check.
- Is / Is Not (Does / Does Not) – Select the preferred option here.
- Condition – This compares the given value with the value of the actors in the scene. The condition can vary per value type. For example, a string type also shows the Starts With and Ends With option, while a boolean type only shows Equal to.
- Value – The value to check for.
- Remove condition – Remove this condition line. Be careful, there is no undo!
- Add Condition – Add another condition line.
- Add Class Group – Add another class group. You can have multiple selection classes at the same time.
- Select Actors – Select all actors that match the current set conditions.
- Console – The console shows the output of the action. It can be cleared with the Clear Console button.
- Remove class Group – Remove the entire class group and its conditions. Be careful, there is no undo!